Creating a handmade apron can be a simple yet rewarding DIY project that provides not only a useful kitchen accessory but also a personalized touch to your cooking adventures. This step-by-step guide will take you through the process of crafting your very own apron in easy-to-follow stages. Whether you’re making one for yourself or as a gift, you’ll learn how to select fabrics, cut your pattern, and sew pieces together, all while ensuring your apron is both functional and stylish. Let’s tie on our creativity and dive into the delightful world of apron making!
Choosing the Right Materials
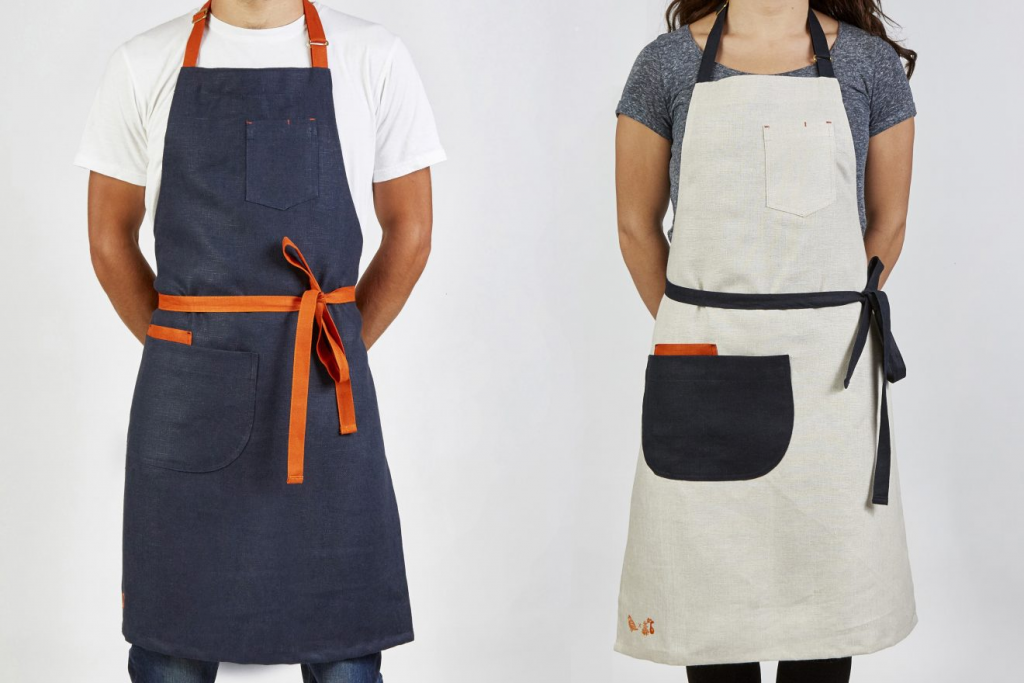
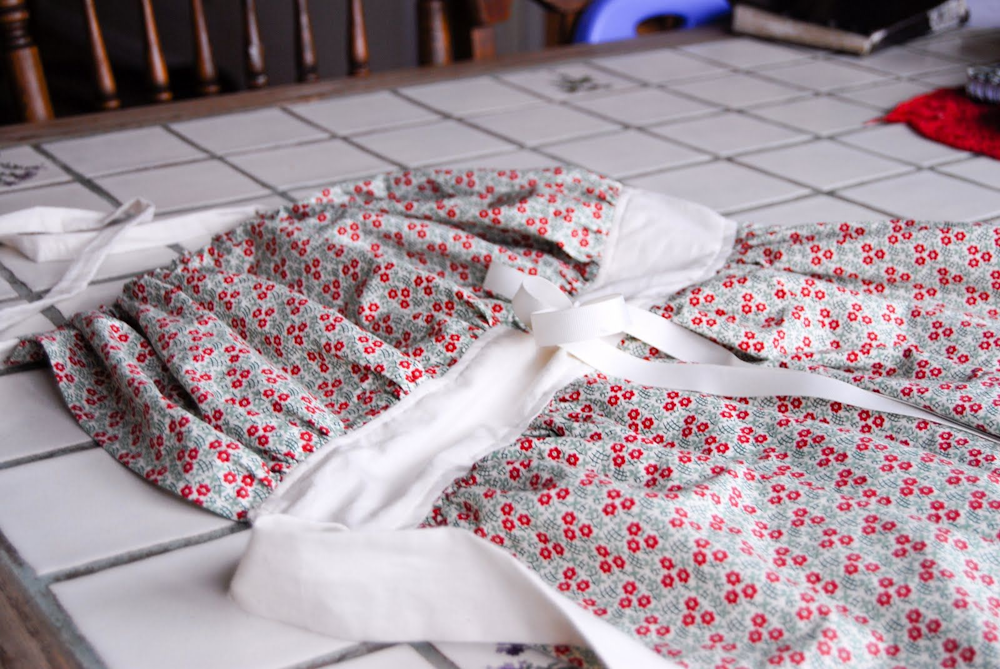
The foundation of any DIY apron is the fabric you choose. Opting for durable materials such as medium-weight cotton or canvas can ensure your apron withstands kitchen spills and stains. You might also consider denim, linen, or even oilcloth for different looks and levels of protection. The pattern you select should reflect your personal style, whether it’s a classic checkered look, a floral print, or a solid color.
To visualize your finished piece, lay out your fabric and imagine how it will look as a full apron. For a unique twist, consider mixing and matching different fabrics for pockets and ties.
Necessary Tools and Accessories
Before you start sewing, gather all the necessary tools and accessories:
- Measuring tape for taking your body measurements and fabric dimensions.
- Scissors or a rotary cutter for precision cutting of the fabric.
- Sewing pins or clips to hold the fabric and pattern in place while you cut and sew.
- Sewing machine, though you can also hand-sew if preferred.
- Iron and ironing board for smoothing out your fabric before cutting and for pressing hems during the sewing process.
- Thread that matches your fabric and a needle (for a sewing machine or hand-sewing).
Preparing Your Workspace
Having an organized workspace is essential for any sewing project. Make sure you have a clear, flat area where you can lay out your fabric and patterns. Good lighting is crucial so you can see what you’re doing, and all your tools should be within arm’s reach. It’s also helpful to have your ironing board set up nearby so you can press fabric and hems as needed throughout the process.
Step-by-Step Apron Making Guide
Cutting Your Fabric to Size
Start by measuring and marking your fabric according to the apron dimensions you desire. Typical aprons measure around 27-30 inches wide and 33-36 inches tall. For full aprons, remember to include the bib and neck strap lengths in your calculations.
With your measurements in hand, draw out the apron shape on your fabric using chalk or a fabric marker. Where the patterns call for it, ensure you’re allowing for seam allowance. Once all your lines are drawn, carefully cut out your apron body and any additional pieces, such as pockets or waist ties.
Hemming the Edges
For a clean finish, hem the outer edges of your apron. You can do this by folding the edges over ¼ inch, pressing with an iron, then folding again and pressing to enclose the raw edges. Pin the hem in place and sew along the inner folded edge all around the apron body.
Creating the Apron Ties
The apron ties are essential for ensuring your apron fits securely. Measure and cut two long strips of fabric for the waist ties – they should be long enough to wrap around the wearer’s waist and tie comfortably. For the neck strap, adjust the length according to the wearer’s height. Fold the strips in half lengthwise, right sides together, and sew along the long edge and one end. Turn the ties right side out and press flat.
Attach the waist ties to the sides of the apron at the waistline and the neck strap at the top corners of the bib. Reinforce these areas by sewing over the seam multiple times.

Adding Pockets and Decorative Touches
Pockets are not only practical but can also add character to your apron. Cut out one or more pocket pieces, depending on your needs. Hem the top edge of the pocket, then fold and press the remaining three edges inwards. Position your pocket(s) on the apron front and pin in place. Sew around the sides and bottom of the pocket, backstitching at the beginning and end to secure.
Now is also the time to add any decorative touches, such as appliqués, lace trim, or embroidery. Be creative and personalize your apron to suit your taste or that of the person you’re making it for.
Final Touches and Maintenance
Once all pieces are attached, give your apron a final iron to smooth out any wrinkles and set the seams. If you’ve chosen a fabric that can fray over time, consider using a serger or zigzag stitch over the raw edges inside for additional protection. Care instructions for your apron depend on the fabric used, but most homemade aprons can be machine washed and dried on low heat settings.
Conclusion
The art of making an apron is a journey that combines creativity with functionality. Whether you’re a beginner or a seasoned seamstress, the steps provided in this guide empower you to craft a personalized apron tailor-made to your tastes and needs. Embrace the process, and you’ll cherish the result!
FAQs
What is the best type of fabric for making an apron?
Medium to heavy weight cotton or canvas are ideal for aprons due to their durability and ease of washing. Denim is also a popular choice for its robustness.
Do I need a sewing machine to make an apron?
No, a sewing machine is not strictly necessary. You can hand sew your apron using basic stitching techniques, though a machine might make the process quicker and offer a more professional finish.
How do I choose the right size for my apron?
Consider the apron’s intended use and who will wear it, making sure it covers from the chest to at least mid-thigh. The ties should wrap comfortably around the waist.
Can I add pockets to my apron?
Yes, pockets are quite practical for storing tools or recipes and can be customized in size and number based on personal needs or preferences.
How can I personalize my apron?
Personalization can come in the form of fabric choice, adding embroidery, painting on the fabric, or attaching various decorative elements such as patches or lace.